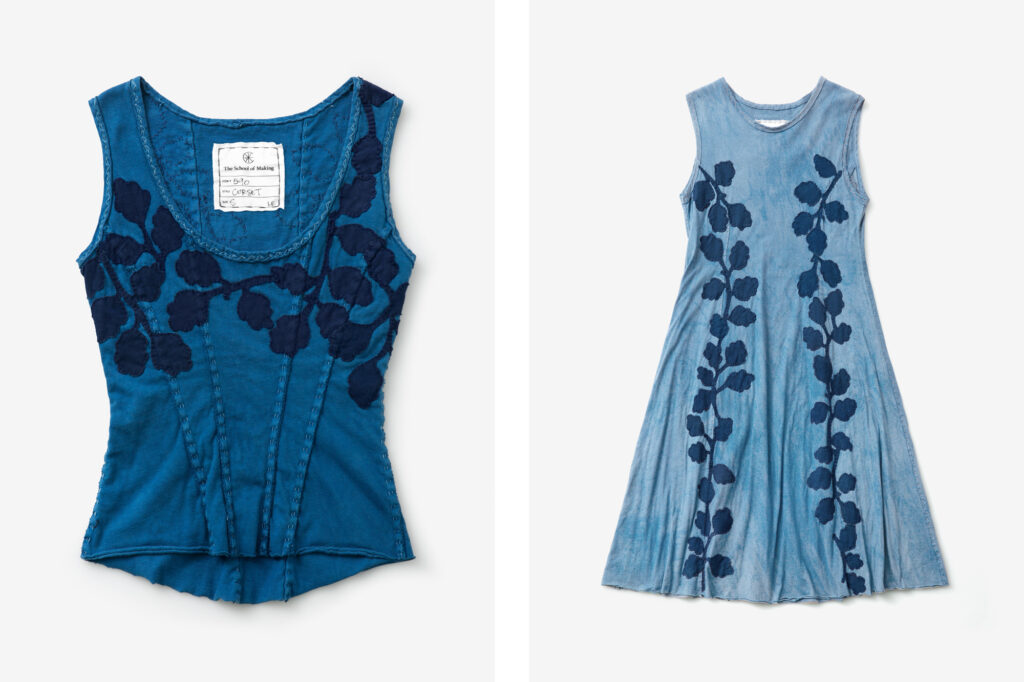
I have to admit that, when Alabama Chanin’s unique reverse applique t-shirts gained popularity in the late 2000s, I wasn’t a fan. Unfinished edges (even though cotton jersey doesn’t need to be finished), uneven hand stitching, and exposed thread tails — the details that others found charming went against my tailored style aesthetic. I couldn’t see the forest for the trees.
Fast forward 20-some-odd years and I now see the appeal. It’s not about perfectly even stitches or neatly finished hems. It’s about the process of creating by hand and honoring the people and the stories behind the stitches. It reminds me of the Japanese tradition of sashiko.
Alabama Chanin’s pieces highlight generations-old techniques and traditions. The entire garment is hand-stitched — from the applique and embellishments to the seams — and each applique is carefully cut by hand. The gorgeous result is the ultimate in slow fashion.
Types of Applique
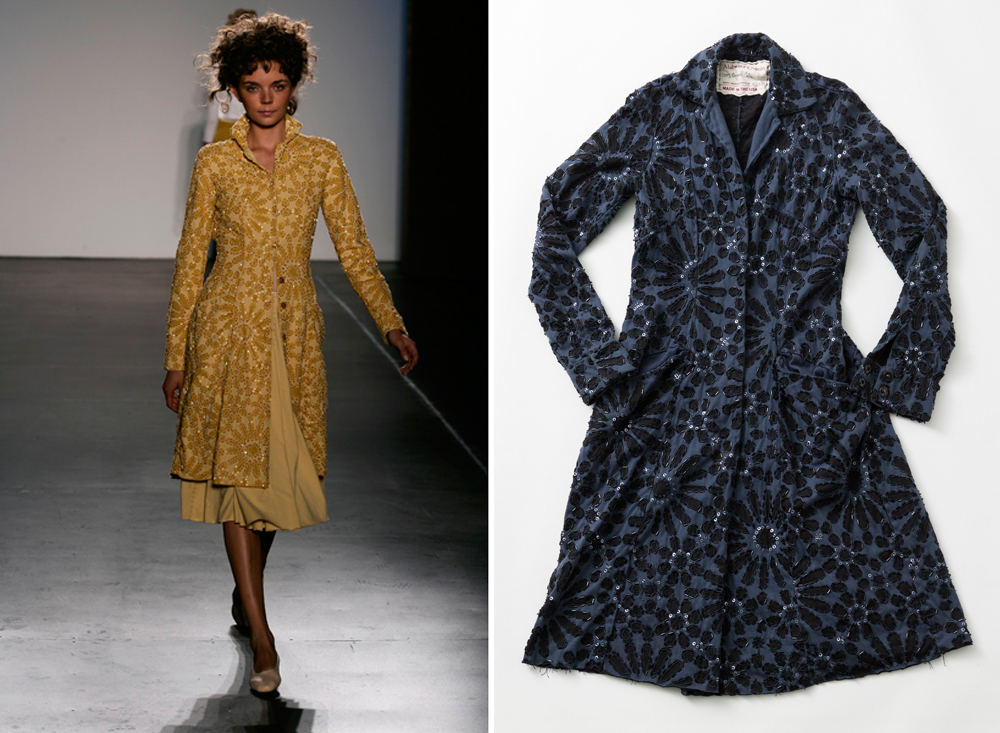
This is a wonderful example of how different applique and beading techniques were used to create a stunning coat. Image from here
Alabama Chanin is best known for their reverse applique style, but there are two other forms that are often used: traditional applique and negative reverse applique.
Reverse Applique
With reverse applique, two layers of fabric are stitched together using stitches that follow the edges of the applique design. The design on the top layer of fabric is cut away to reveal the bottom layer of fabric.
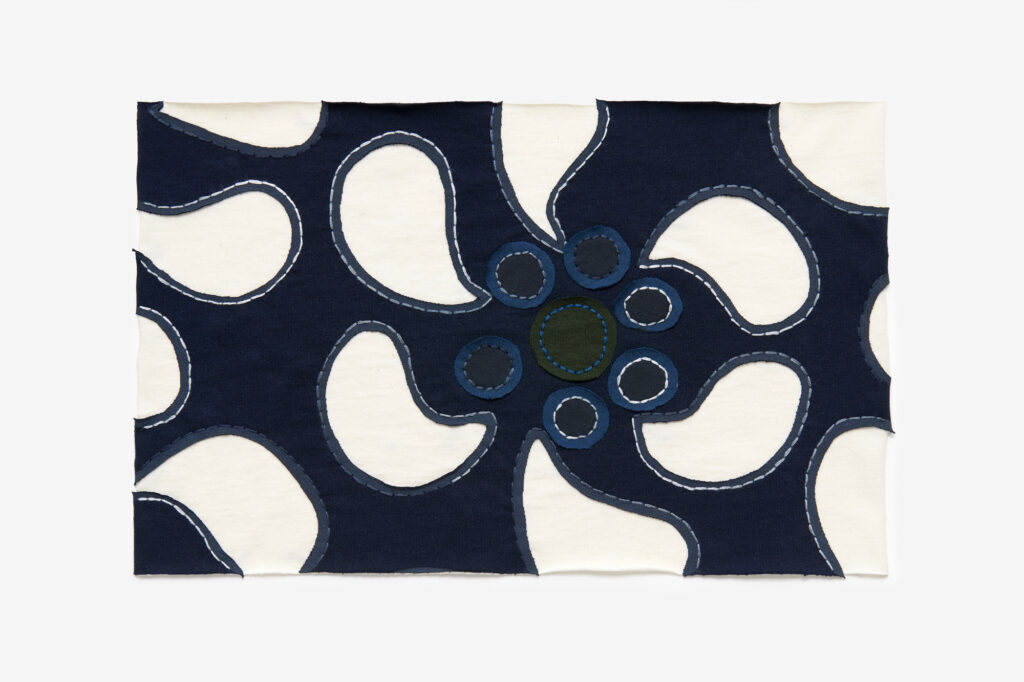
Image from here
Negative Reverse Applique
The applique design is stitched onto two layers of fabric with the stitching line inside of the design. The areas outside of the design on the top layer of fabric are cut away to reveal the bottom layer of fabric.
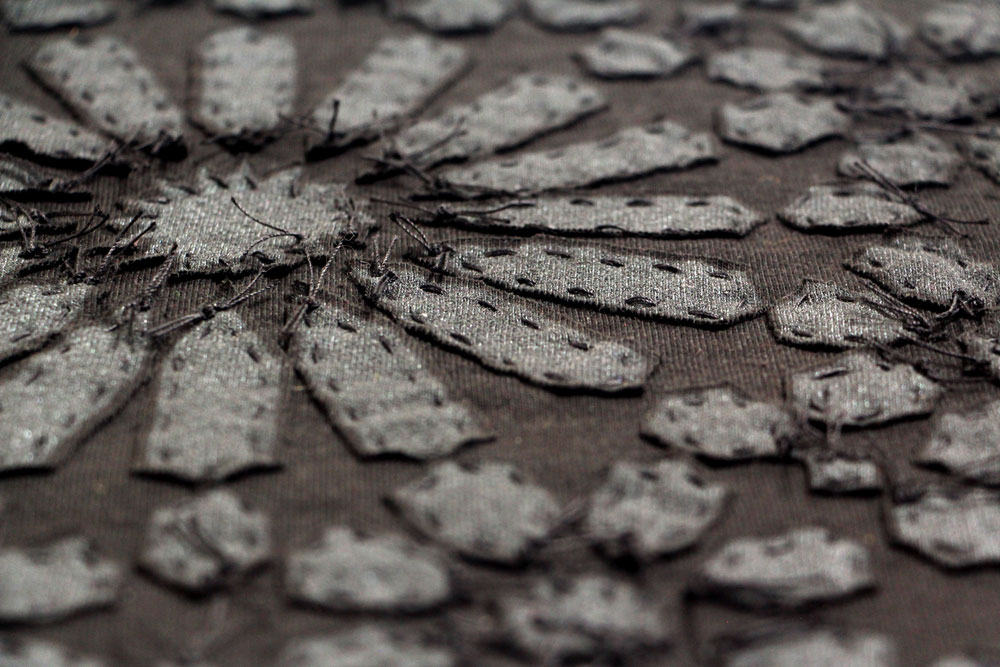
Image from here.
Traditional Applique
The applique design is cut out from one fabric and stitched on top of a second fabric using a variety of stitch types.
The leaves are cut from a dark blue fabric and stitched onto the garments. Image from here
Starting My Project
My first project is a simple four-panel A-line skirt using the reverse applique technique. I chose a navy blue cotton jersey as the top layer and a cream cotton jersey as the bottom layer. Such a classic color combination!
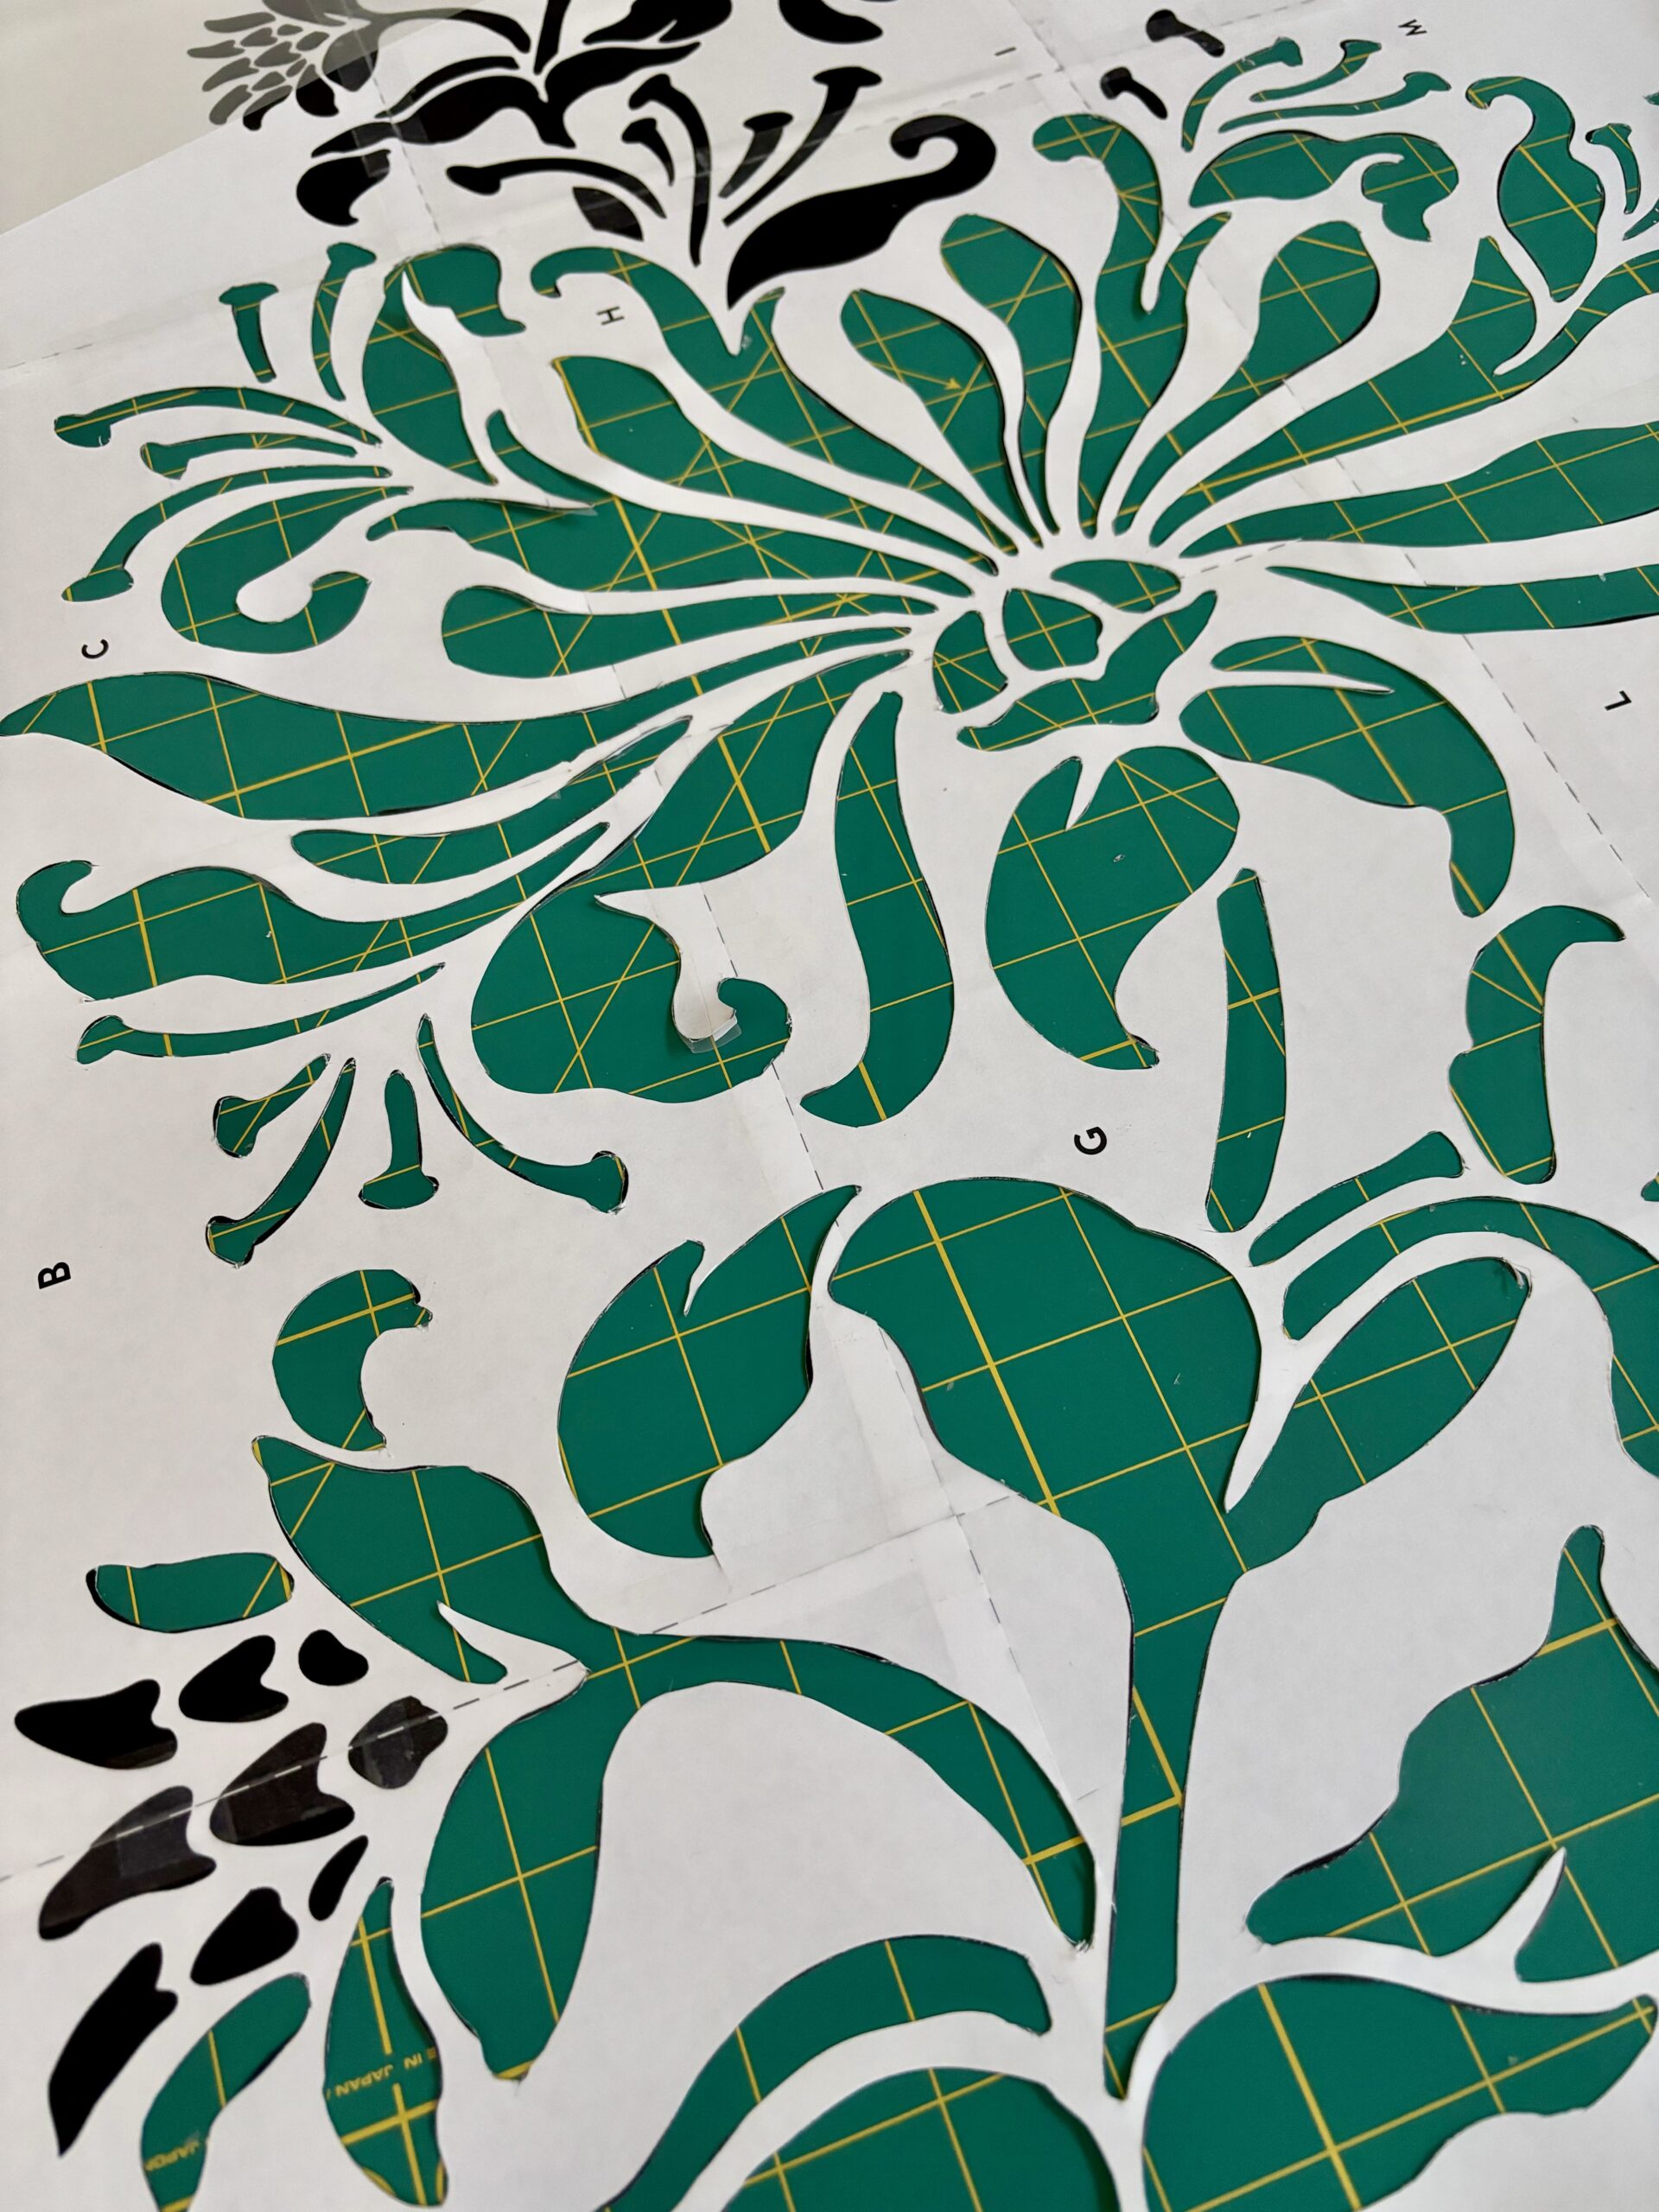
I then prepared a mylar stencil of the Magdalena design from Alabama Chanin. Cutting mylar — even the thinnest one — wasn’t easy because of the curves in the design. Patience, a steady hand, and even pressure were key.
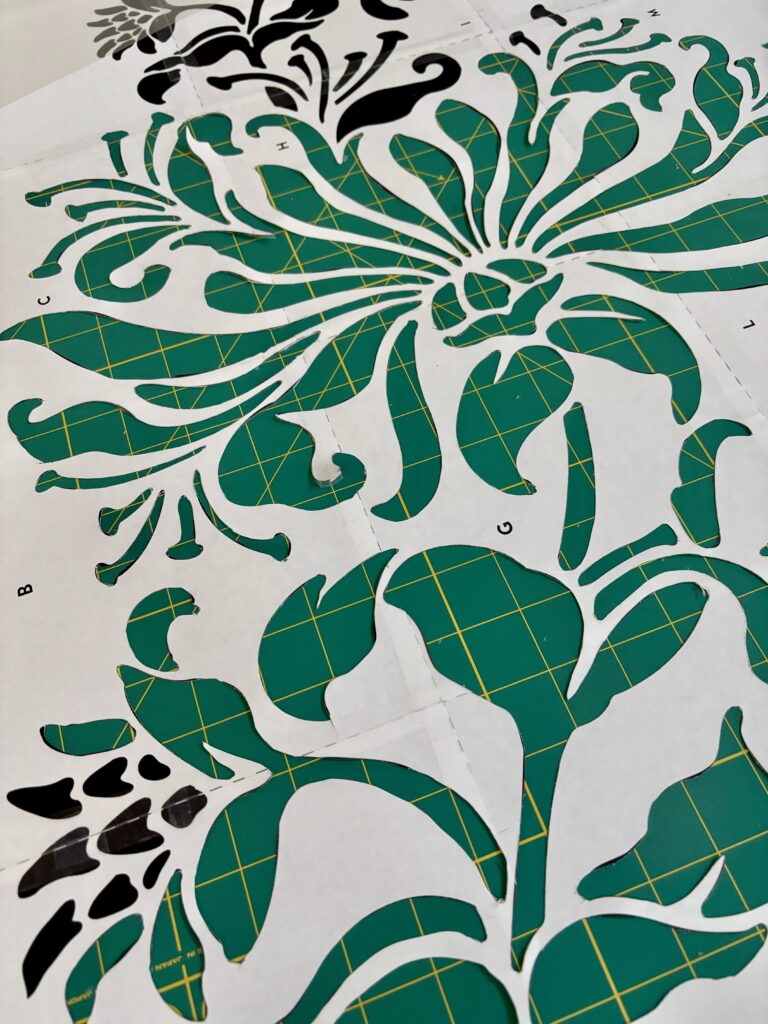
I secured the paper pattern to the mylar sheet with a repositionable adhesive spray and cut out the design using a Gyro-Cut Pro tool. Materials purchased from here.
After cutting out the skirt panels, I prepared the navy blue pieces for stenciling. Using a fabric spray paint (Tulip ColorShot) to transfer the design to the fabric was a good choice, as spray paint was faster and the application was likely lighter than sponging on fabric paint.
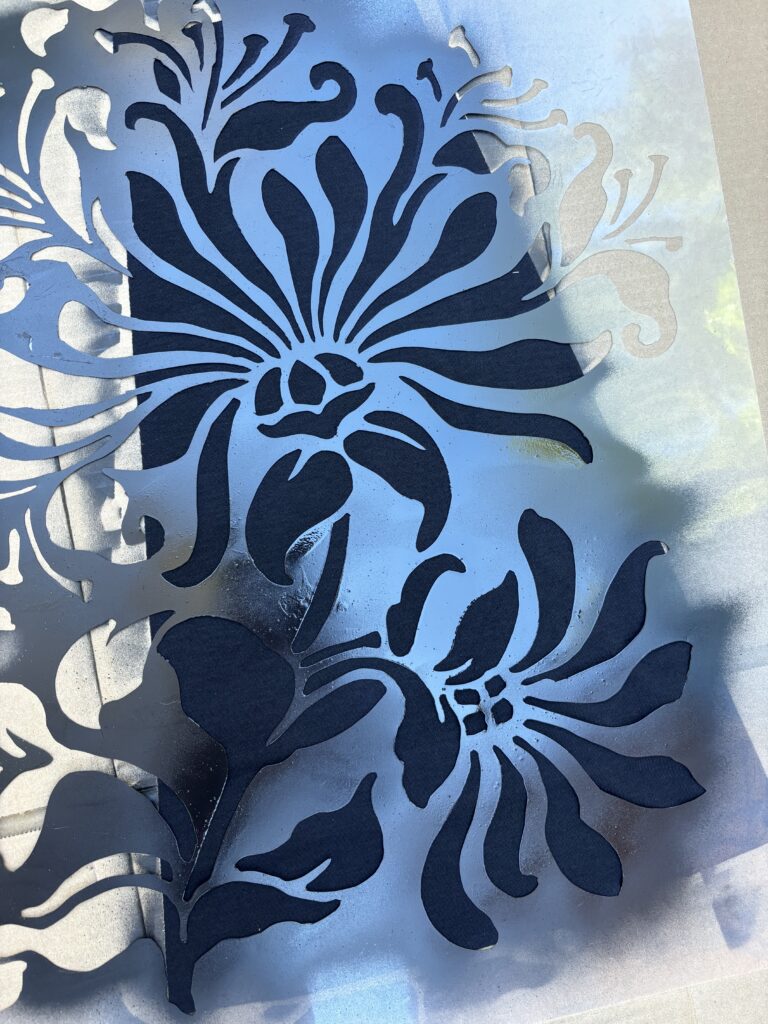
I sprayed adhesive spray to the back of the mylar pattern and positioned it onto the fabric, choosing the design placement for each panel. After spraying one coat, I let it sit for a few minutes, then sprayed a second coat.
I love how the stenciling turned out! My only regret is that spraying black paint on navy blue fabric makes it difficult to clearly discern the design, so a lighter color paint may have been better.
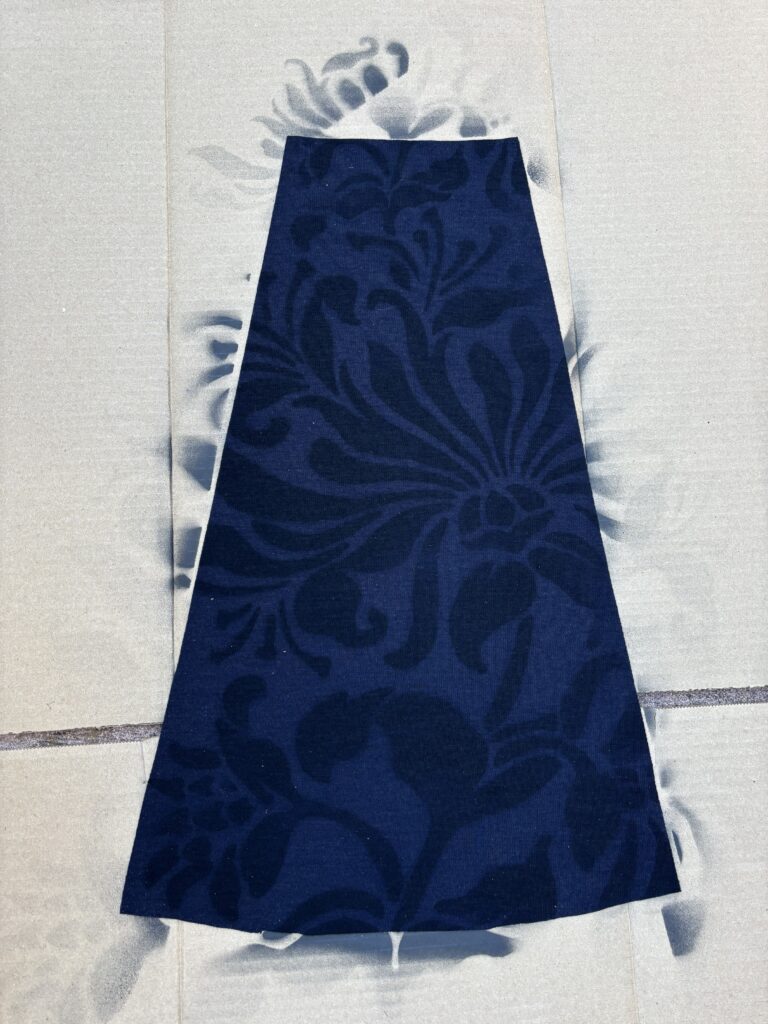
Here’s one skirt panel with the painted design. So pretty!
Next up — hand-stitching the design through both layers of fabric!
Leave a Reply
You must be logged in to post a comment.